- No products in the cart.


A single invisible contaminant on a beaker, flask, or pipette can compromise days of research, distort clinical data, or trigger hazardous chemical reactions. In modern laboratories, glassware sterilization is not a routine chore, it is a controlled, compliance-driven scientific process.
From proper detergent selection to validated sterilization methods, every step directly impacts data integrity, personnel safety, and regulatory standing.
This guide provides a clear, step-by-step framework for cleaning, sterilizing, and storing laboratory glassware with confidence and precision.
Key Takeaways:
-
Clean glassware before every use to prevent contamination and inaccurate results.
-
Always clean before sterilizing, residue can block effective sterilization.
-
Use lab-grade detergents and proper brushes to avoid residue and scratches.
-
Rinse thoroughly with tap water, then distilled or deionized water.
-
Autoclaving at 121°C for 15–30 minutes is the most reliable method of sterilization.
-
Choose dry heat, chemical, or UV sterilization based on material and application.
-
Store sterilized glassware properly to prevent recontamination.
-
Consistency in cleaning and sterilization protects data, safety, and compliance.
Why Glassware Cleaning And Sterilization Are Non-Negotiable
Even microscopic residues, such as grease, detergent film, dried media, or trace chemicals, can distort meniscus readings, interfere with serological reactions, promote microbial growth, or cause dangerous chemical mixing.
Beyond accuracy, contaminated glassware poses direct safety risks: residue from a previous acid can react violently with a new reagent if the vessel is not properly cleaned first.
Labs operating under ISO 4787, GMP, CFR 211.67, or ASTM D5245-19 standards also face compliance consequences if cleaning protocols are not followed. A well-structured glassware sterilization program protects data integrity, personnel safety, and regulatory standing simultaneously.
How Often Should You Clean Lab Glassware?

The 5 Core Steps For Cleaning Laboratory Glassware
Effective glassware sterilization requires more than a quick rinse. Proper technique, appropriate detergents, thorough rinsing, and controlled drying all help prevent contamination and protect experimental accuracy. Following a structured process ensures residues are fully removed and surfaces are prepared for sterilization. The five core steps below outline a practical, repeatable approach to safely and consistently cleaning laboratory glassware.
#1: Inspect Before You Wash
Before cleaning begins, examine each piece for cracks, chips, scratches, and etching. Damaged glassware is a breakage hazard, especially when heated, and scratches create sites where microorganisms can shelter. Set aside any compromised items and dispose of them in a properly labeled sharps container. Never attempt to clean and reuse cracked or chipped glassware.
#2: Remove Visible Contamination And Pre-Rinse
Discard any remaining contents into an appropriately labeled waste container. Rinse immediately with the appropriate solvent, water for aqueous solutions, ethanol, or acetone for organic compounds. For strong acids or bases, dilute or neutralize cautiously under a fume hood before rinsing with copious amounts of tap water. This pre-rinse removes bulk contamination and prepares the surface for detergent.
#3: Wash With The Right Detergent And Tools
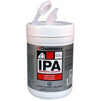
Use a laboratory-grade, non-ionic, metal-free detergent such as Alconox, Liquinox, or Sparkleen. Avoid household dishwashing liquid, it may leave residues that interfere with sensitive assays. Hot water improves cleaning efficiency. Scrub all surfaces thoroughly with brushes that fit the specific item, buret, test-tube, flask, or pipette. Each has a purpose. Use only brushes with wooden or plastic handles to avoid glass abrasion, and replace brushes whose metal spines are exposed.
For heavily soiled or organically contaminated items, chromic acid cleaning solution (sodium dichromate in concentrated sulfuric acid) provides powerful oxidizing action. Handle it with rubber gloves, safety glasses, and a plastic apron, it is a potent corrosive and a known carcinogen. Dispose of it according to local regulations. For stubborn grease, boiling in a weak sodium carbonate solution or soaking in acetone works well. Silicone grease requires soaking in warm decahydronaphthalene for two hours.
Keep your glassware cleaning process consistent and compliant with the right supplies and equipment.
Shop Lab Supplies
#4: Rinse Thoroughly, Then Rinse Again
Residual detergent is a common cause of assay failure and is invisible to the naked eye. After washing, rinse with running tap water at least six times, actively filling and emptying the vessel each time. Follow with at least three rinses in distilled or deionized water. For microbiological assays, increase this to twelve rinses in distilled water. Pipettes and burets should be rinsed with water using rubber tubing connected to a faucet.
A cleanliness test: pour deionized water through the rinsed glassware. If the water sheets evenly across the surface without beading or breaking into droplets, the glass is clean. Uneven wetting signals contamination.
#5: Dry Properly
Never dry glassware with a cloth or paper towel, fibers and residues transfer easily to clean surfaces. Air-dry by placing items inverted on pegs or in baskets. Oven drying is suitable for most glassware at temperatures not exceeding 140°C (or 110°C for PyrexPlus coated items). For immediate use, rinse two to three times with acetone, which is miscible with water and evaporates rapidly. Avoid blowing air directly into glassware, moisture condenses on interior surfaces.
Glassware Sterilization Methods: Choosing the Right One
Cleaning removes contamination, and glassware sterilization eliminates all microbial life. The two processes are sequential and complementary: never attempt to sterilize glassware that has not been thoroughly cleaned first, as organic residue shields microorganisms from the sterilizing agent.
Autoclaving (Moist Heat)
Autoclaving is the most reliable method for sterilizing glassware in most laboratory applications. Steam at 121°C under 15 psi for 15-30 minutes kills bacteria, fungi, viruses, and spores by denaturing their proteins. Load items loosely into the autoclave basket to allow steam penetration. Don’t overload the chamber; and always use loose caps or closures on vessels. If viruses or spore-forming bacteria are suspected, autoclaving is mandatory. For PyrexPlus-coated glassware, sterilization should not exceed 15 minutes at 121°C, and drying should not exceed 110°C for 15 minutes.
Dry Heat Sterilization
Dry heat glassware sterilization uses a hot-air oven at 160-180°C for 1-2 hours. This method is suitable for heat-resistant borosilicate glass that cannot tolerate moisture. Wrap items in aluminum foil or sterilization bags before placing them in the oven. Allow the oven to cool naturally to a safe temperature before removing items. Dry heat is not appropriate for PyrexPlus-coated glassware due to the risk of coating degradation.
Chemical Sterilization
Chemical methods, ethanol immersion, hydrogen peroxide, or formaldehyde suit glassware that cannot withstand high temperatures or for localized surface sterilization. Submerge in 70-75% ethanol for 15-30 minutes, then dry with sterile air. Rinse thoroughly after any chemical sterilization to eliminate all residues. Note that chemical sterilants are generally not appropriate for items that will contact sensitive biological cultures unless thoroughly post-treated.
UV Sterilization
UV light damages microbial DNA and is effective for sterilizing small glassware items or the interior of biosafety cabinets. Expose items for 30 minutes to several hours, ensuring all surfaces receive direct UV exposure. UV sterilization is not a substitute for autoclaving in critical applications. It cannot penetrate surfaces and is less effective against spores.
Also, read:
Special Handling For Specific Glassware Types
Not all laboratory glassware can be cleaned and sterilized the same way. Differences in shape, calibration, chemical sensitivity, and application require tailored handling procedures. Using the wrong cleaning method can damage precision instruments, compromise sterility, or interfere with analytical results. The following guidelines outline best practices for safely maintaining specialized glassware.
-
Pipettes: Place the tip down in water immediately after use to prevent residue from drying. After washing and soaking, run tap water through the barrel using rubber tubing. Soak in distilled water for at least one hour before drying. For bacteriologic pipettes, plug the top end with cotton before sterilization.
-
Burets: Remove the stopcock, wash barrel and stopcock separately with detergent, rinse with tap water, then deionized water, and dry. Lubricate the glass stopcock with a minimal amount of stopcock lubricant before reassembly. Always cover burets when not in use.
-
Culture tubes and Petri dishes: Sterilize by autoclaving at 121°C for 30 minutes before cleaning. Empty while hot if solidified media is present, then brush with detergent, rinse, and dry. For pre-sterile use, plug and autoclave before adding media.
-
Serological tubes: Keep completely separate from other glassware. Even trace detergent, acid, or alkali residue will interfere with serological reactions. Use dedicated brushes and storage.
-
Hematology glassware: Avoid detergents entirely, even minute concentrations cause red blood cell hemolysis. Clean under tap water with a brush, then soak in dichromate solution for 12-24 hours before a final thorough rinse.
-
Slides and cover glass: Wash, soak in glacial acetic acid for 10 minutes, rinse with distilled water, and store in alcohol until use.
Proper handling of specialized glassware preserves both accuracy and longevity. By applying item-specific cleaning and sterilization procedures, laboratories prevent cross-contamination, protect calibrated measurements, and reduce the risk of equipment damage. Attention to these details ensures that even the most sensitive glassware performs reliably and remains compliant with laboratory standards.
Storing And Common Mistakes
Cleaning and sterilization are effective only if the glassware remains protected afterward. Improper storage or small procedural errors can quickly undo an otherwise successful sterilization cycle. Understanding how to store glassware correctly is essential to maintaining sterility, safety, and workflow efficiency.

After cleaning and sterilization, protect glassware from recontamination. Plug openings with cotton, corks, or heavy paper. Store in dust-free racks with items separated to prevent breakage. Do not store alkaline solutions in volumetric flasks or burets, as stoppers and stopcocks can seize. Handle glassware by the body, not the rim or joints, and avoid stacking items.
Proper glassware cleaning and sterilization are essential to reliable laboratory work. Every experiment depends on equipment free of residue, contamination, and hidden microbial risk. By following disciplined cleaning procedures, selecting the appropriate sterilization method, and storing items properly, laboratories protect data integrity, ensure personnel safety, and maintain regulatory compliance. Attention to these details transforms routine maintenance into a controlled process that safeguards research integrity. In the laboratory, precision does not begin at measurement. Iit begins with clean, properly sterilized glassware.
At Lab Pro, we help laboratories maintain high standards of cleanliness, sterility, and operational control. We provide reliable access to laboratory-grade glassware, autoclaves, heating and temperature-control equipment, cleaning chemicals, detergents, deionized water solutions, cleanroom consumables, and PPE required for safe, compliant lab operations.
Our Vendor Managed Inventory (VMI) services ensure critical supplies, from sterilization materials to routine cleaning essentials, remain consistently stocked at appropriate levels. This reduces supply disruptions that can compromise sterilization workflows or delay laboratory processes.
By combining reliable products with proactive inventory management, Lab Pro supports contamination control, regulatory compliance, and consistent laboratory performance.
Maintain clean, sterile, and audit-ready lab operations with dependable supplies and inventory support.
Explore Lab Solutions
FAQs
Can I skip cleaning and go straight to glassware sterilization?
No. Sterilization only works on clean surfaces. Residue, biofilms, and debris shield microorganisms from heat, steam, and chemicals. Even a proper autoclave cycle cannot ensure sterility if contamination remains. Clean first, sterilize second.
How do I know if my autoclave glassware sterilization cycle worked?
Use chemical and biological indicators. Chemical strips confirm the correct temperature was reached. Biological indicators containing Geobacillus stearothermophilus spores confirm actual microbial kill. If the spores do not grow after the cycle, sterilization was successful. Test with biological indicators regularly according to your lab protocol.
Is plastic labware easier to sterilize than glass?
Not easier, just different. Polypropylene and polycarbonate can usually be autoclaved at 121°C. Polyethylene, polystyrene, and PVC cannot withstand autoclave temperatures and require gas or chemical sterilization. Glass is more chemically inert and can withstand repeated sterilization cycles, making it better suited for long-term use.
What is the shelf life of sterilized glassware?
Properly wrapped and stored glassware can remain sterile for months if the packaging stays intact. Re-sterilize items with torn wrapping or that have been exposed to dust or humidity. Date and label items and use first-in, first-out rotation.
Why does my glassware have a cloudy film after autoclaving?
Cloudiness usually results from hard water minerals, detergent residue, or moisture in PyrexPlus coatings. Remove mineral deposits with a dilute acid soak. Prevent detergent film by increasing rinse cycles and using deionized water for final rinses. PyrexPlus cloudiness clears with overnight drying or brief heating to 110°C.