- No products in the cart.


When it comes to maintaining the glassware of your laboratory, having a standard operating procedure (SOP) is a necessity. A good laboratory glassware cleaning SOP should be one which not only embodies efficiency but also promotes safety.

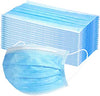
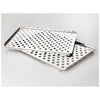
Laboratory Glassware
Different types of glassware to be cleaned according to laboratory glassware cleaning SOP
Glassware tends to be the area where many laboratories tend to face confusion. Cleaning glassware in a laboratory is not similar to washing dishes. These need to be handled with care. A large number of beakers, test tubes and other glass pieces need to be sanitized, cleaned and stored in pristine condition each day. If contamination occurred, it could result in experiments failures, products have to be thrown out, data could get skewed, time in the lab and valuable chemical components can be wasted.
The threat of contamination is very high without a good SOP in place. If your goal is to decrease potential waste of resources while ensuring lab safety and accurate results, here is how to develop a laboratory glassware cleaning SOP:
Step 1: Always Have Safety Gear
No laboratory glassware cleaning should be done without the appropriate safety equipment. The following should be made mandatory:
- Lab coat
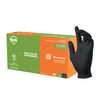
- Heavy duty or Nitrile gloves
- Safety apron
- Safety goggles or glasses
- Face shield or mask
A fume hood should also be available to prevent any fumes for the glassware. Any chemical backsplash can harm skin and ruin clothes, so an apron or full-sleeved lab suit is recommended. Also, make sure to have anti-slip rubber mats around the cleaning basin to lower the chances of accidents.
Step 2: Glassware Inspections
Make sure to carry out glassware inspections routinely. Look for cracks, signs of damage or abrasion. These can make the glassware weak and there’s a bigger chance of them breaking. Make sure you’re working with a good laboratory glassware supplier so that it is easy to get replacements, particularly for high volumes of general glassware.
Step 3: Cleaning According to Chemicals
One of the major things you need to do is clean the glassware in accordance with the solution it was used for. Try the following for your laboratory glassware cleaning SOP:
- Water Soluble – Use de-ionized water. Rinse 3 to 4 times.
- Insoluble – Rinse with acetone or ethanol 2 to 3 times and then rinse with de-ionized water 3 to 4 times.
- Strong Acids – Use a fume hood – Rinse thoroughly with a lot of tap water and then rinse with de-ionized water 3 to 4 times.
- Strong Bases – Use a fume hood – Rinse thoroughly with a lot of tap water and then use de-ionized water to rinse them 3 to 4 times more.
- Weak Acids - Use de-ionized water and only rinse up to 3 to 4 times.
- Weak Bases - Use de-ionized water. Rinse only 3 to 4 times.
Step 4: Cleaning Specialized Glassware
Cleaning specialized glassware also needs to be added to your laboratory glassware cleaning SOP. The following are the steps that you should include:
- Burets – Use a soapy, hot water solution. Rinse thoroughly with tap water and then rinse 3 to 4 times with de-ionized water.
- Volumetric Glassware – These are usually soaked overnight in warm, soapy water. Rinse thoroughly with tap water and then rinse them 3 to 4 times using de-ionized water.
Step 5: Cleaning Baths
Once clean, you need to place glassware in cleaning baths where they are removed from all contamination. The following is what you need to do:
- General Glassware – This needs to be soaked in a base bath for at least 3 hours or overnight. Make sure that there are no air bubbles and all glassware is completely submerged in the solution. Once you remove the items, rinse 3 to 4 times with de-ionized water. Now, transfer it into the acid cleaning bath and let it soak for at least 3 hours or leave it overnight. Once time is up, rinse with de-ionized water and let it soak in the solution for 3 hours more. After that, use de-ionized water to rinse it 3 to 4 times before placing it on the drying rack.
- Volumetric Glassware – You’ll follow the same routine, except you’ll soak them twice in an acid bath instead of using a base bath and an acid bath. Always make sure you get all the air bubbles out when soaking them.
Step 6: Drying Properly
Never use a paper towel or an air dryer to dry your glassware. This can leave fibers or introduce impurities. It’s advisable to let it air-dry on a shelf. You should also include the following conditions in the laboratory glassware cleaning SOP
- Immediate Use – Rinse the glassware with acetone, at least 3 to 4 times, if you need to use it immediately. This facilitates the drying of water much faster.
- Water Contamination – If water reacts with the final solution, you can rinse it 3 times with a reagent solution.
In conclusion, the threat of contamination on your laboratory glassware significantly increases without a good SOP in place. Follow the steps above to ensure improved results.
For over 40 years, Lab Pro has been committed to delivering a complete laboratory solution by offering the highest quality products, chemicals, reagents, microscopes and imaging equipment for our customers worldwide. Come visit the biggest Lab Supply showroom in the Bay Area or contact us online or at 888-452-2776 to purchase high-grade glassware for your laboratory.